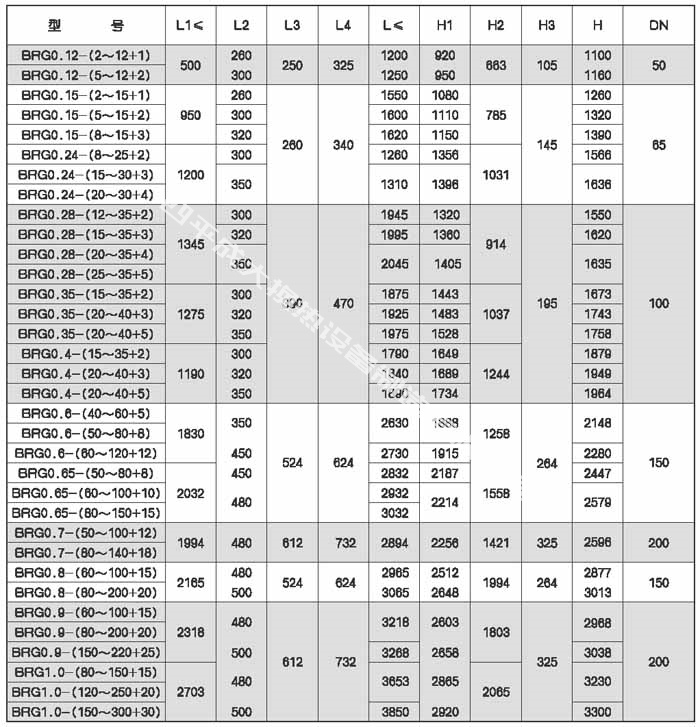
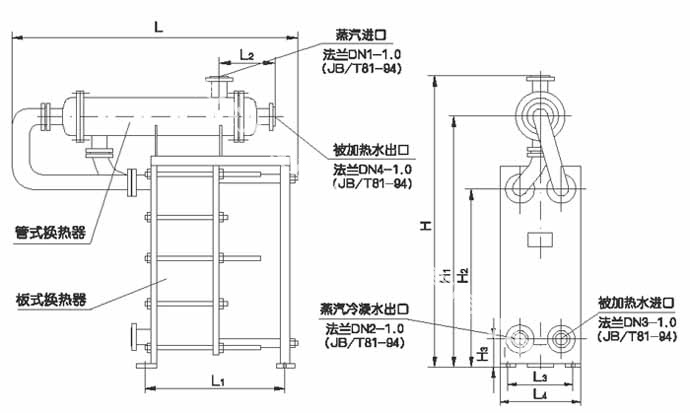
I. Parameters of steam-water plate heat exchanger
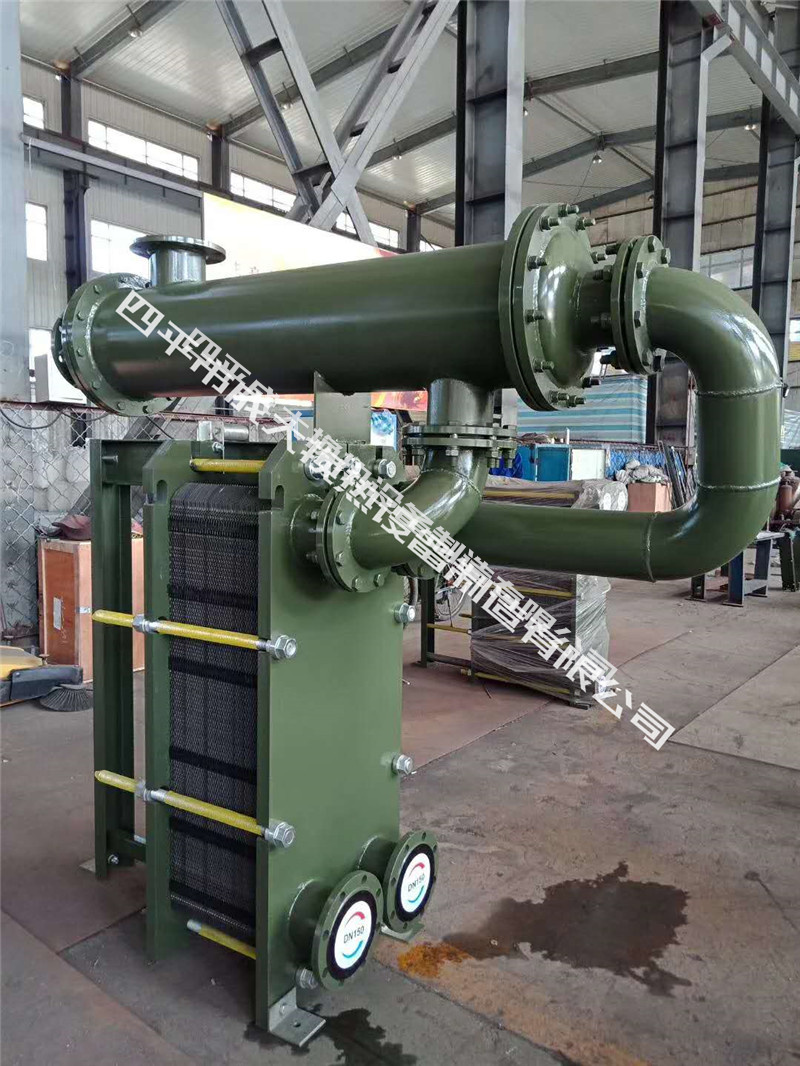
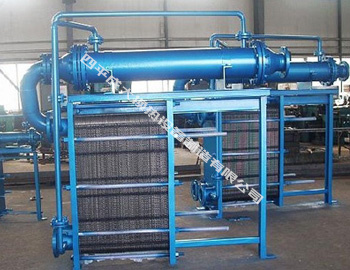
In order to overcome the disadvantage of low operating temperature of the traditional plate heat exchanger, when the hot side medium is steam whose temperature exceeds the design temperature of the sealing gasket, a cooling and decompression device is installed on the plate heat exchanger to ensure the stable and reliable operation of the equipment. For convenience of installation and design, the overall dimensions of the steam-water heat exchanger are given in the sample for reference only. The following are typical models, and the final design needs to be confirmed by the technical department of our company.
Second, the installation, use and maintenance of plate heat exchanger
(1) Installation
1. hoisting
Plate heat exchangers are designed with lifting rings or eyes, and slings should be arranged diagonally during loading and unloading. If there is no package, it is forbidden to load and unload them by inserting cars, so as to avoid damage to the heat exchangers.
2. Installation
Plate heat exchanger should be installed on hard cement foundation or cement floor. Floor drain and sewer should be provided on the ground. Enough space (≥ 10a omm) should be left around the heat exchanger for observation and maintenance. The connecting pipeline should be firmly supported, and the longer pipeline should have a gap at the corner, so that it can expand and contract in cold and hot. Thermometers and pressure gauges should be installed on the inlet and outlet pipes of the heat exchanger so as to observe its working conditions during operation.
When the medium is water-water heat exchange, hot water generally enters from the upper interface of the heat exchanger and is discharged from the lower interface; on the cold water side, cold water enters from the lower interface of the heat exchanger and is discharged from the upper interface. This is done for the purpose of "countercurrent" heat exchange in the opposite flow direction of the medium in the hot and cold adjacent heat exchange channels inside the heat exchanger, so that the cold and hot heat exchange channels of the heat exchanger can always keep a relatively balanced temperature difference in the heat transfer process, which is beneficial to heat exchange.
When the medium is steam-water heat exchange, steam should enter from the upper interface of the heat exchanger, and condensate should be discharged from the lower interface. The hot side of the heat exchanger should be assembled in a single process, and no steam traps should be installed at the condensate outlet, so that the condensate can be held out freely. (Many users can't hold out the condensate smoothly after installing steam traps at the condensate outlet, resulting in the phenomenon that the temperature of the heated water is too low). When more steam emerges from the condensed water, the valve of the steam inlet of the heat exchanger can be adjusted to reduce the supply of steam. The discharged condensed water belongs to clean operation and should be returned to the boiler for utilization. One side of the cold water enters A from the lower end and is held out from the upper end. A water pump is installed on the cold side pipeline system of the heat exchanger, so that the heated water can circulate for heat exchange and heat supply. The installation position I of the water pump shall be at the inlet side of the heat exchanger.
The highest point of the installation pipeline should be provided with a holding valve, and the air in the pipeline will be discharged when water is filled. A drain valve should be provided at the lowest point of the pipeline.
For the newly installed pipeline, there may be more sundries in the pipeline. A decontamination device should be installed on the pipeline between the user's return water and the inlet of the water pump. The return water first passes through the decontamination device and then flows into the heat exchanger through the water pump, so as to prevent sundries from entering the A heat exchanger and blocking it. Valves should be installed at both ends of the decontamination device.
(2) Use
1. Water quality standards
When the plate heat exchanger should be used for heating, according to the requirements of the design code of urban heating network, the water quality of the plate heat exchanger should meet the following requirements:
① dissolved oxygen is less than or equal to 0.1mg/li
② the total hardness is less than or equal to 0.7mg-n/L.
③ Suspended matter is less than or equal to 51 ng/L;
⑤ When the plate is made of 304 stainless steel, the chloride ion content in the medium is ≤25ppm.
When the plate heat exchanger is used in the domestic hot water system, the water quality of the secondary network should also meet the requirements of Taiwan National Hygienic Standard for Drinking Water GB5749.
2. Operation and use
Before the formal operation, check whether each clamping nut of the child heat exchanger is loose, and if so, tighten it. First fill the cold side pipeline system with cold water, then turn on the water pump to circulate the water, stop the circulation after a period of time, close the valves at both ends of the decontamination device, open the decontamination device to hold the sewage, and then recycle it. This will repeatedly discharge the sewage. When the sundries in the pipeline are exhausted, drain the sewage and refill it with clean water. If the circulating pipeline on the hot side is long and there are many sundries in it, it should also circulate the cold water to discharge the sewage like the above-mentioned cold side. After the pipeline is clean, it is ready for formal discharge.
During the formal heat exchange operation, the valves on the cold water side should be opened first. Turn on the water pump to circulate, and then slowly open the valve on the hot water or steam side to enter the heat exchange operation state. When stopping operation, first close the valve on the hot water or steam side, stop the hot medium from entering the heat exchanger, and then close the circulating water pump on the cold water side. Failure to close the heat medium pipeline without cold water circulation will damage the heat exchanger. During operation, if the water pump stops running due to sudden power failure, the heat medium inlet valve should also be closed immediately.
During the initial heating operation, the volume of water on the cold water side may expand with the increase of water temperature, which may cause the water pressure to rise. When it exceeds the designed pressure, it may cause the secondary pipe to break. Therefore, when the pressure is too high, necessary measures such as electromagnetic valve or safety valve should be taken to discharge some water in the cold side pipeline system, so as to reduce its pressure.
Before installation, heat the oil cooling or oil, and blow dry the water that may remain in the heat exchanger. The operating pressure should make the oil side higher than the oil side. To prevent water from entering oil A during leakage.
When the chloride ion damage of the technical quality is too high (more than 25PPM), it will cause corrosion to the stainless steel heat exchanger plate; When the harm of calcium and magnesium ions in water quality is too high, it will scale on the heat exchange plate. In this case, it is best to chemically purify the water.
(3) Maintenance
After the heat exchange plate scales, the heat exchange efficiency is greatly reduced. The heat exchanger can be disassembled for cleaning. The disassembly method is: for the hanging plate heat exchanger, when the installation position is fixed, first remove the clamping bolts. When the lower guide rod is round steel, loosen the nuts at both ends of the lower guide rod, twist the lower guide rod by 90 with adjustable wrench, and then move the lower guide rod downward to make it leave the original positioning position. Move the movable clamping plate to one side of the pillar, and then move the heat exchanger plate to the notch of the upper guide rod to remove the heat exchanger plate.
For the disassembly method of the non-hanging plate heat exchanger, remove the heat exchanger pipe and move it to the whole, with one side of the flange interface facing down. First, remove the nuts at the upper ends of the two guide rods, then remove the clamping bolts and the clamping plate at the upper side, and then remove the heat exchanger plates in turn. Brush the heat exchanger plates with clean water to remove the dirt attached to them, and do not hit them with hard objects, so as not to cause ripple deformation and leakage after assembly.
Wipe and dry the plate after brushing, and wipe and dry the sealing rubber pad after washing. Glue the sealing rubber pad 801 to the sealing groove of the plate, and then assemble it after the glue dries. If the sealing rubber pad is aged and deformed. Contact the manufacturer to replace the new sealing rubber pad. A rubber-like sheet used can be purchased from the local plumbing shop, with a thickness of 3-4mm and made of nitrile. Maggots can be seen in front of the exploded view. The installation sequence is reverse to the above disassembly sequence. First, stick the cut rubber plate on the fixed clamping plate, and then install the heat exchange plate along the guide rod, with the back of the sealing groove of the heat exchange plate facing the rubber plate, and the herringbone corrugation direction of adjacent heat exchange plates should be opposite.
For the installation of non-hanging heat exchanger, two sections of lengthened butt-joint guide rods should be prepared before installation. The diameter of the guide rods is the same as that of the original guide rods, one end is internally threaded, and the other end has a certain guiding chain degree. When installing, screw the internal thread of the extended guide rod on the external thread of the original guide rod to form a long guide rod with continuous cylindrical surface, and then install the heat exchange plate. After the whole clamping is installed, remove the extension guide rod.
When clamping, use a special wrench to tighten the clamping nut (the manufacturer of the special wrench does not provide it, and the user can purchase it by himself). For the clamping size, the original size should be recorded before disassembly, and the clamping should be determined according to its original size, or refer to the clamping size in the previous parameter table (the size of products in different periods may be different, so you can ask the manufacturer). During the clamping process, each nut should be tightened evenly, and the distance between the two clamping plates should be continuously measured so that the two clamping plates are always in a parallel state.
If the plate heat exchanger has slight dripping phenomenon in use, the clamping nut can be slightly tightened to reduce the clamping size, which may eliminate the leakage.
When stopping operation in winter, the heat exchanger and the water in the pipeline should be drained to avoid freezing and cracking of the pipeline and heat exchanger.
Any error in installation or operation may cause unstable operation of the system or malfunction of the instrument display. Our company has formulated the matters needing attention for many years' frequent problems, and uploaded the typical installation principles of heat exchangers for customers to study and learn together, which can be downloaded from our website.
 中文
中文 English
 SALES CALLS:+86
 AFTER THE PHONE:+86